
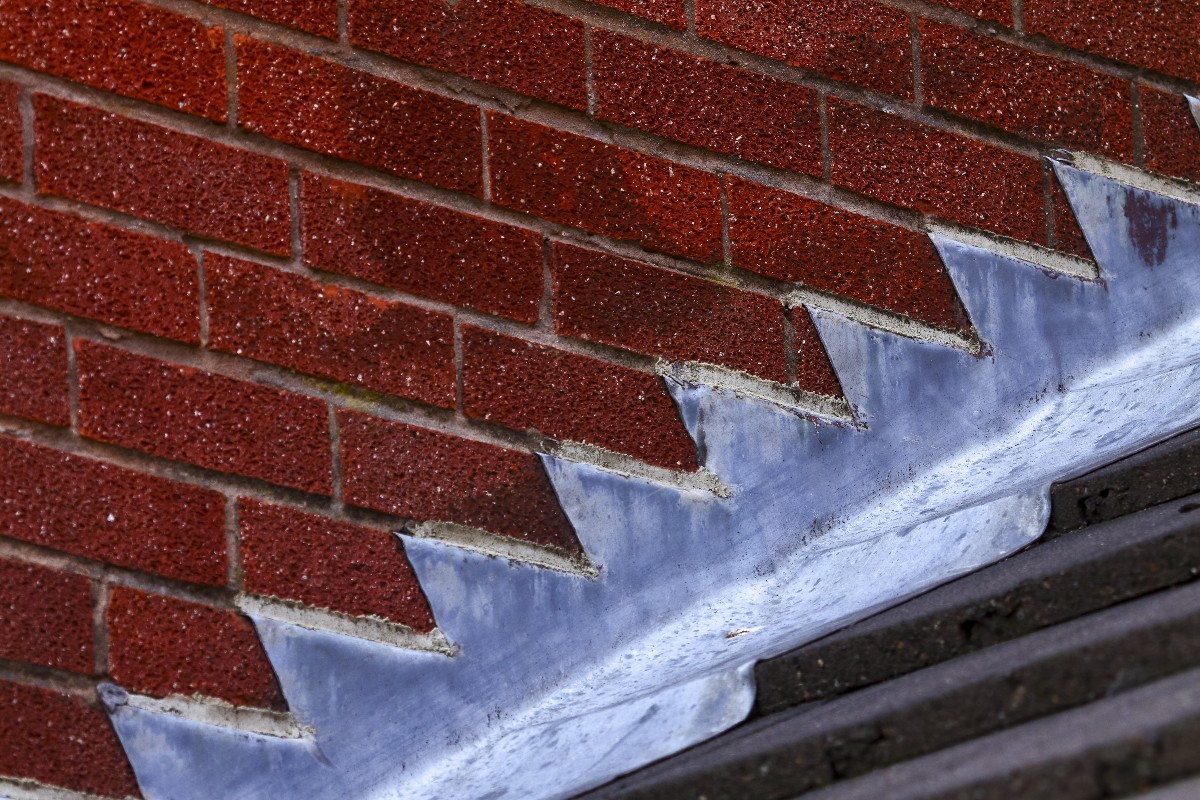
Step flashing refers to a series of bent metal segments that span the joints between the shingles of a roof and adjacent walls. The step-style placement prevents water from migrating into the walls as it flows down the roof.
With this type of flashing, one segment is placed at each course of shingles so the flashing will lap the next underlying course, making a watertight joint. Aluminum is the most affordable and commonly used flashing material, but copper is sometimes used on fancier roofs.
A Word of Warning
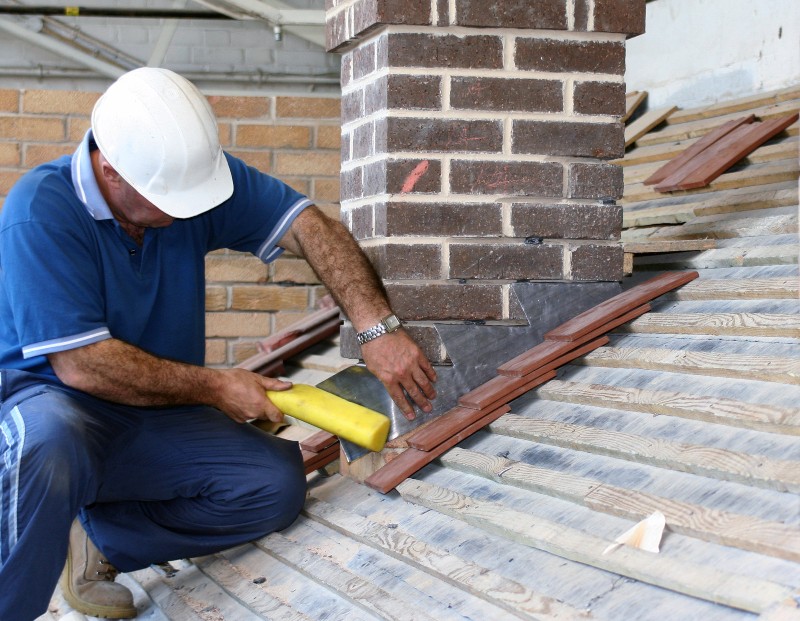
When installed correctly, step flashing can protect your home from catastrophic leaks. If you have a lot of experience and feel comfortable working from a ladder, you may be able to install them yourself. With that said, this comes with significant risk, not only to yourself but your home.
Inexperienced homeowners often suffer injuries with these sorts of roofing projects. They also frequently cause expensive damage to their homes. With this in mind, consider hiring a professional roofing contractor to make sure the job is done safely and correctly. If you’re dead set on attempting this yourself, however, here are the steps you can take.
Installation
When installing step flashing, it’s important to consider that structures will shift over time. If you nail your step flashing to both the roof and wall, you are likely to face complications.
Step 1: Create corner flashing from your step flashing. After you’ve finished shingling up to the sidewall, trim a piece of flashing at a 45-degree angle from the bent seam to the outside corner of the wall. Then bend it back and down to sit flat on the corner. Next, hammer two nails into the wall close to the top (Be sure to add one on each face).
Step 2: Apply a bead of roofing caulking. Where the next segment of flashing will overlap, add a bead of roofing caulk to seal the corner. This particular area is vulnerable to leaks because it tends to lack optimal overlap. Make sure your sealant is specifically designed for roofs or it will fail over time.
Step 3: Bend the first segment at the plumb line. The first segment of flashing needs a single bend so it will lap over the corner flashing you installed during the previous step. Be sure the caulking joint between these two segments is evenly bedded. Then hammer a nail into the sidewall to fasten the flashing in place.
Step 4: Start the weave. Every piece of step flashing is intended to rest under the shingle above and over the shingle below. The lower edge of the flashing is supposed to extend just below your nail line. Affix each piece with one roofing nail, placed high enough so it will be covered by the following course of flashing, along with the building wrap and siding. Work your way upward toward the roof peak.
Step 5: For the first side of the roof peak, cut the flashing at the fold line. Then bend down the lower flap and add one nail to fasten it in place. Once you add the last piece of flashing to the wall, apply caulk to close the seam where the two adjoining rises of step flashing meet at the roof peak.
Step 6: Create the final piece of flashing. This is essentially the brother to the one you have already applied to the peak. Cut the flashing at the fold line, bend the flap down, and press the segments together along the caulking joint. Hammer one nail into the wall to fasten the last piece.
Step 7: Once you’re finished, half of the flashing should be entirely covered by shingles. Once the building paper and siding are applied, nearly all of it will be concealed, which is one of the biggest reasons flashing must be carefully installed to begin with.
When installing step flashing, you apply a little flashing, then you do a lot of roofing, then you add more flashing, and so on. This is why you really need the help of a reputable roofing contractor with decades of experience performing these types of projects.
For decades, the professionals at A to Z Roofing have served countless satisfied customers throughout the Denver metro and the Front Range. For nearly a quarter of a century, we have been the go-to source for expert residential roofing, repair and restoration for homeowners and businesses throughout Colorado. During this time, we’ve provided comprehensive service using only top-quality products. Contact our attentive team to learn how we can restore, repair or replace your damaged or aging roof.