
Drip edges are critical components that keep water from causing costly damage to your roof and supporting structures. Read on to learn how to install a drip edge and find out why it’s so important to do the job correctly.
Things You Should Know
Building codes exist to ensure that homes are in compliance with a state’s requirements. One of these codes centers on the drip edge. To pass an inspection, your home’s roof must include drip edges at all gables and eaves. They must also be installed correctly.
Most local codes state that adjacent pieces of drip edge must be overlapped 2 inches at minimum. They also typically state that drip edges must extend upward a minimum of 2 inches and a minimum of a 1/4 of an inch below roof decking. Underlayment must also be appropriately installed over the drip edge along the eaves of the roof and beneath the underlayment on gables.
If you fail to properly install your drip edges, your home may not pass an inspection when you try to sell it. That said, there are some instances when drip edges aren’t technically required.
If your home has a pre-bent aluminum fascia that sits flush with your roof decking, that will serve as a functional drip edge. Rake molding can also serve as an adequate drip edge on properties built before the roofing industry began using aluminum fascia.
Just like today’s drip edges, rake molding and aluminum fascia sit along the eaves, covering the edge of your roof deck to keep water in its rightful place. If your home has rake molding and aluminum fascia, you don’t necessarily need a drip edge.
Installation
If you’ve determined that your home needs a drip edge, you should think strongly about hiring a professional. It’s quite common for inexperienced do-it-yourselfers to make errors that can lead to problems down the line. That said, if you’re dead set on trying it yourself, here are the steps you should take.
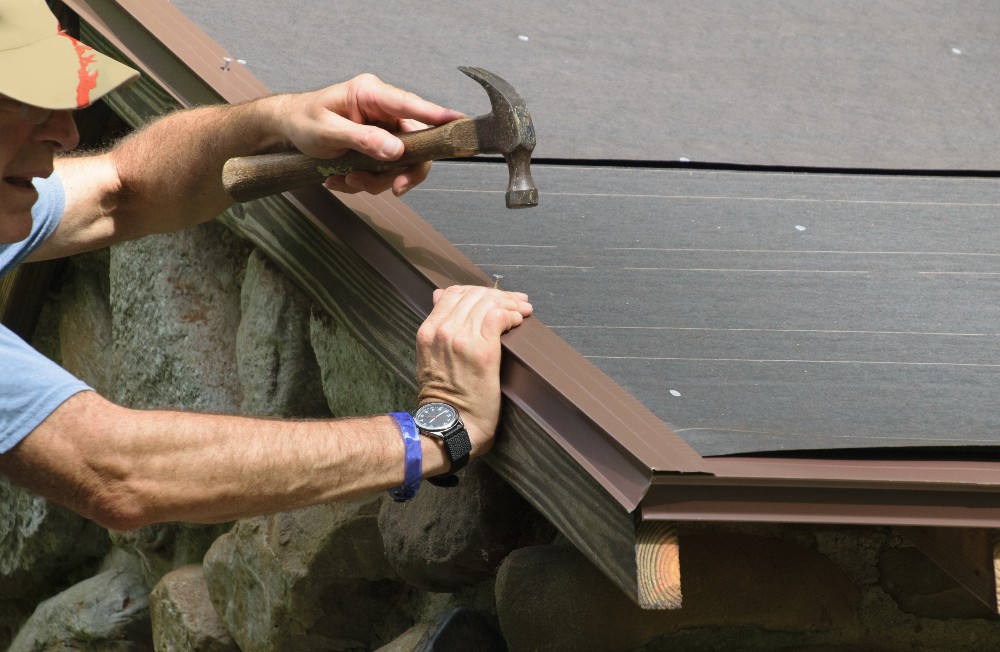
Step 1:
First, you have to place the wide, flat flange beneath the first course of shingles. When doing so, be sure none of the outer edges protrude past the gutter. If you can’t see the edges sticking out, pull the drip edge out slightly to compensate.
Step 2:
Next, you must secure the material in place using roofing cement. Add only a small bead of adhesive to the top of the drip edge. Then, apply firm pressure to the shingle.
Step 3:
It’s a good idea to add some roofing nails to ensure a more secure fit. Hammer in some roofing nails high up on the shingle to help hold the drip edge in place.
An Important Component
There are a lot of reasons your roof needs a drip edge. For one, they direct water away from fascias to keep them from rotting over time. They also help protect the edge of the roof decking from water penetration. Drip edges can also seal gaps at the bottom of your roof, so mice and other pests can’t enter your attic. They can also protect the bottom of your roof from ice dams.
Unfortunately, a drip edge won’t function properly if it’s not properly installed. What’s more, inexperienced homeowners often suffer injuries when performing these sorts of projects. They also often cause accidental damage to their roofs, leading to hundreds of dollars in needless expenses.
Unless you have a lot of experience working on these types of projects, it’s generally best to work with a professional. At the same time, it’s important to make sure the professional is a reputable local roofer with extensive experience serving the local community. Too often, certain roofing contractors will cut corners by either leaving off drip edges or improperly installing them. When this occurs, you will have a lot harder time passing a home inspection because your roof will not be up to code.
For decades, A to Z Roofing has provided expert residential roofing, restoration and repairs. A locally owned company, we’ve operated continuously throughout Colorado for nearly a quarter of a century. During this extensive period, we’ve served homeowners and local businesses, providing knowledgeable service using quality products. Contact our courteous professionals to learn how we can repair, restore or replace your aging or damaged roof.